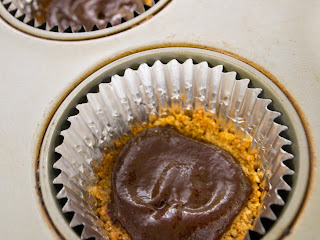
I am starting with food as I found it the easiest for collecting my thoughts and getting back into the rhythm of writing. I am going to break it down into separate blogs to keep it from being too lengthy.
These days, I tend to find most of my recipe inspirations through the gazillion of food blogs I follow (yes, I know I have a problem!). In fact, I have been feeling a little guilty about neglecting my gazillion of cook books (yes, I know… problem… let’s move on now). Anyways! We have had some great finds along the way and some not so great successes. Sometimes it just doesn’t seem to turn out exactly how we thought, and sometimes, especially with baking, it seems to be the curse of the high altitude. And, I really don’t have many pictures cuz we suck and don’t think about it at the time. Hopefully my descriptions and amazing word crafting will make up for the lack of visuals… And if you really need pictures, most of the links have pictures for ya!
Brownies and Bars Goodness, Sort of…
One summer find and success was this Grain Free Brownie recipe, and I just recommend the Food Renegade website for some interesting reading in general. My mother-in-law was recently diagnosed with Coeliac’s disease, so I was excited to share my find with her while they were staying in Flagstaff this summer. I have made them with and without the cream cheese swirl, and think they are yummy both ways. More and more people are gluten free either by choice or necessity, so these are great baked good solution that will be a crowd pleaser. I promise you, no one is going to miss the gluten!
A recent attempt at Bourbon Pecan Pie Brownies (what is there not to love in that mix, eh?) has great potential, I think… The flavors were there, but they did suffer from some underdoneness despite cooking both layers past the recommended temperature times. I am starting to wonder if it was a high altitude thing. If I can figure out the baking times, I envision these being the PERFECT dessert to recommend for Kentucky Derby parties. Oh, and Jessica is pretty darn hilarious. I recommend subscribing to her How Sweet It Is blog.
I impulsively bought some Meyer lemons at the CSA store as I have often read rave reviews about this type of lemon and its flavor differences. I decided I really wanted to embrace the lemonyness (according to spell check, I just made this word up), so I determined lemon bars would be the way to go. I have made them before, but it has been a while, and of course I tried a new recipe. Again, I ended up with an underdone custard despite leaving it in the oven for quite a bit longer than the instructed baking time… so I am thinking there just must be something to custardy type desserts at this altitude. However, I struggled to find any good insight in my high altitude baking cookbook, so this is just speculation on my part. They were tasty, but I was not particularly over enthusiastic with the results and there was no Meyer lemon flavor epiphany for me.
Caramel Conundrums
Anything of a caramel type attempt seems to always be a crapshoot… as you may recall from my attempt for Robert’s birthday (link) last year. My friend R asked for caramel cupcakes for her birthday this summer, so I went with a triple caramel cupcake: caramel cupcake with a caramel filling and caramel frosting. They were not a complete failure, but the idea for a caramel filling didn’t work out so well as it just sort of absorbed into the cake instead of being a gooey center surprise. I splurged and bought icing tips and pastry bags. I figured perhaps I should try making my frosting look fancier. Kind of a hot mess (literally and figuratively). It is harder than it looks! I also decided to ix-nay the sugar sculptures.
This winter we decided we wanted to make caramel candies. You know, the almost gooshy, perfectly chewy ones that you wrap in wax paper. Robert diligently cut out 60 squares and helped me stir the caramel to the correct temperature. So, you would think smooth sailing, right? Nope. We ended up with this weird texture that was crunchy when you bit into it and then turned into this pull your fillings out, chewy glob in your mouth. They tasted good, but the texture just sucked. So, fail number 1. I did get creative and mix bits of it into a chocolate cookie batch.
Onto fail number 2. Many years ago, my friend introduced me to this candy/cookie that I call Victoria’s Addictive Cookies and she calls “Crack.” It is always a crowd favorite at parties and potlucks, and ridiculously easy to make except, apparently, at 7000 feet. Although, I swear I made it once this summer with no trouble. However, this winter, we had two complete fails, which was frustrating since I was making it to send home to my family as part of my Christmas package. However, I have since conducted some online research and learned a little more about candy making at high altitude, so at least now I know I am not completely crazy or inept. Many people mentioned they are unable to successfully make caramel or toffee without the use of corn syrup. It also has to do with the fact that water evaporates out at a lower boiling point at higher altitudes.
Here is a pretty helpful chart I found for those who are also trying to make candy at high altitude:
Sugar cookery
For sea level:
215-230 degrees: thread stage
240 degrees: soft ball
245 degrees: firm ball
250-260 degrees: hard ball
265-270 degrees: soft crack
295-310 degrees: hard crack
320-360 degrees: caramel
For every 500 feet. of altitude over sea level, the temperatures drop 1 degree..
For 5000 feet elevation:
205-220 degrees: thread
230 degrees: soft ball
235 degrees: firm ball
240-250 degrees: hard ball
255-260 degrees: soft crack
285-300 degrees: hard crack
310-350 degrees: caramel
Source: Amy DeWitt, Culinary School of the Rockies
The other important detail I learned is that several people recommend calibrating your candy thermometer by identifying at what temperature your water boils and then adjusting cooking times accordingly. Oh. Of course. Lower boiling points. I knew about that. Sooo, I am not giving up!
Here is an cool sounding blog that I may have to add to my list that also explains this: Handmade in High Places
So you are probably wanting the recipe now, right? Here you go!
Victoria’s Addictive Cookies, aka Crack, aka, Saltine Toffee Candy
Ingredients
1 cup of brown sugar
1 cup of unsalted butter
Saltine crackers
2 cups of chocolate chips
Directions
Preheat oven to 400 degrees. Line a jelly roll pan with foil. Place a layer of saltine crackers in the pan. Break up crackers if necessary to fill in empty spaces. Combine sugar and butter in pan and bring to a boil. Stir and cook at the boiling level for about 3 minutes (although clearly, I would now increase this time at my higher altitude). Pour the butter and sugar mixture over the crackers and place in the oven for 6 minutes (again, I am thinking I will extend this time by a few minutes in the future). After you remove from the oven, sprinkle the chocolate chips on it and let sit for a few minutes. After the chocolate has softened, spread the melted chocolate over the pan. Let cool completely (I suggest putting in the refrigerator). After cooled, break into pieces. Store leftovers in the refrigerator.
Remember, share wisely. Crack is addictive…